


I and the children LOVE these AMAZING trash liner jellyfish.
So simple, and yet such an amazing addition to our OCEAN/SEA theme.
I have added a Youtube tutorial at the bottom.

To make these I used two 10 gallon commercial trashcan liners, the ones for small office trash cans, at a cost of about 5 cents and about 10 minutes of time each.
#1 The first liner is opened up, four "corners" [just grab the edge about every 1/4 around] brought together and stapled, then stuffed down into the center of the bag to create a bowl shape.

#2 For the second liner, cut off the sealed edge.

It is accordion folded in fourths. Unfold completely and fold over once to create a square, giving you four layers of plastic.
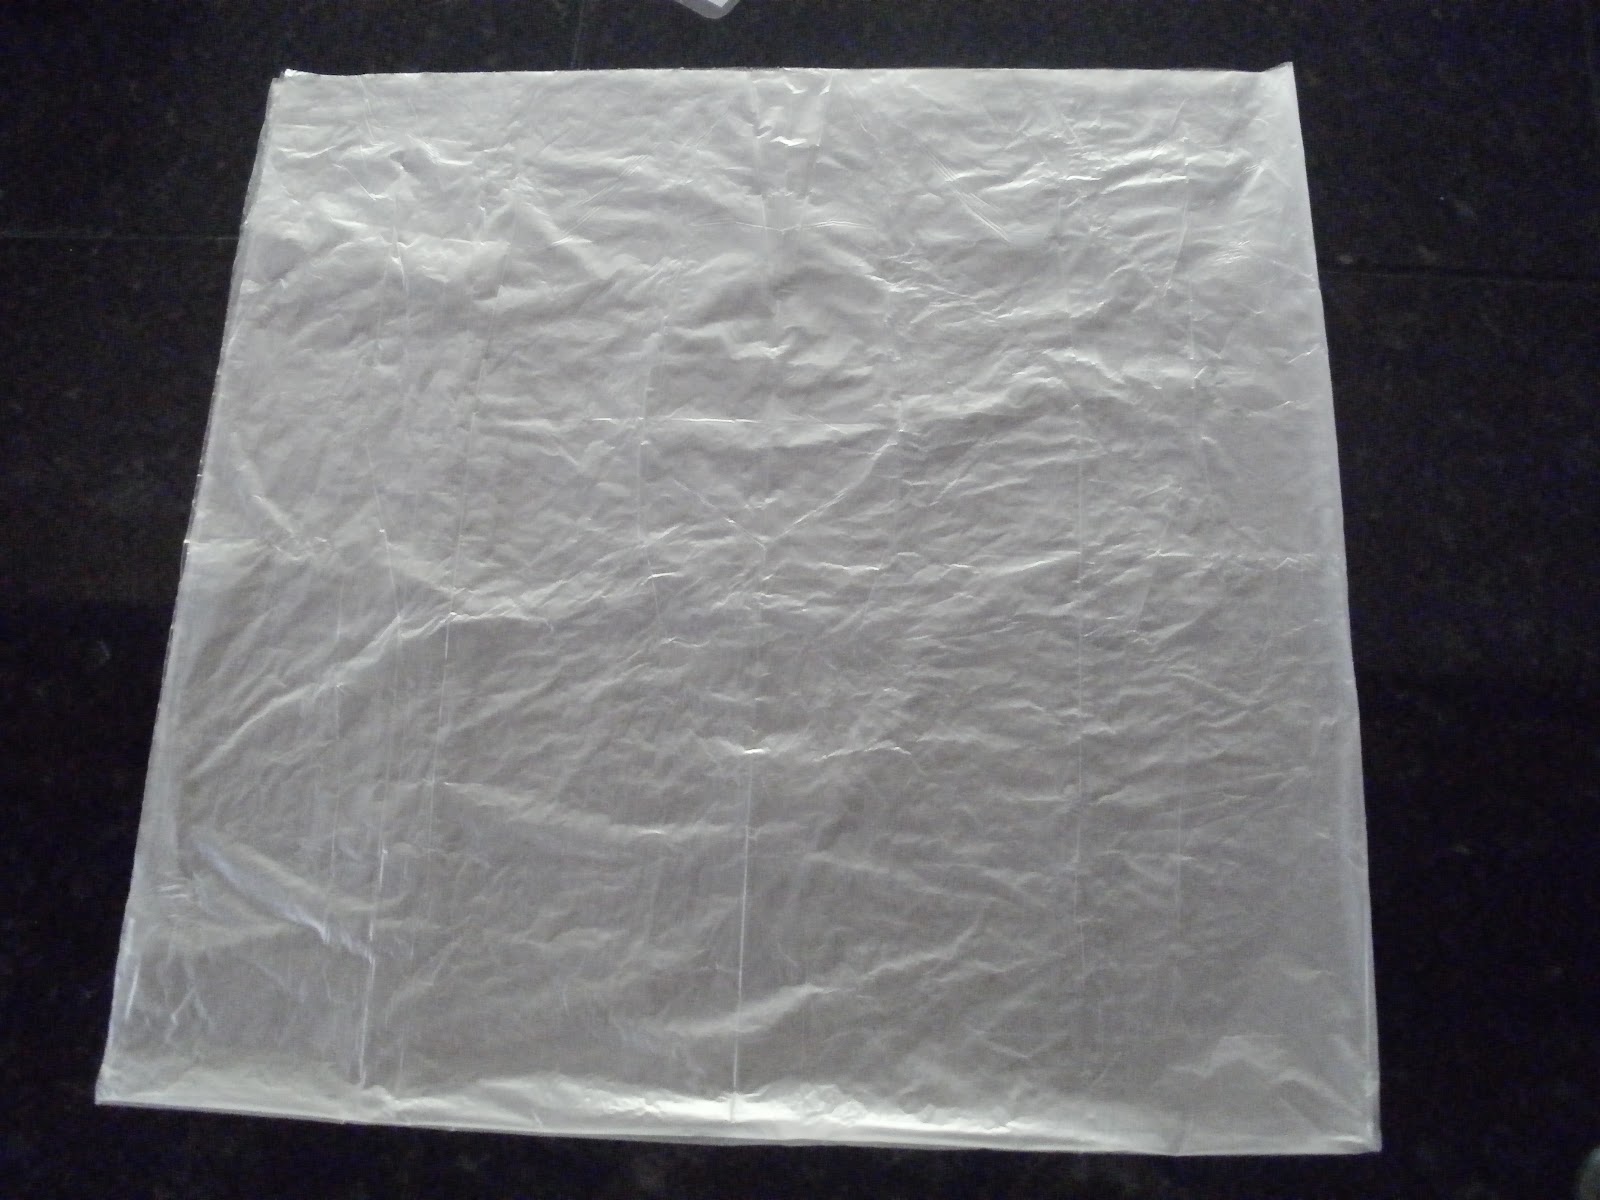
Cut off the edges and cut into spiral. I did about a 1 - 1 1/4 inch thickness. The wider the strip the shorter the "tentacles." I didn't try to be that accurate or to make a perfect circle. I knew once they were opened out that it wouldn't matter.

You end up with a pretty long strip. I folded it in half and cut it to create two strips of equal length. Since it's actually doubled over double layers, this gives you 8 tentacles total. Spread them all apart.
 \
\
If you try to attach them without separating them first, they will cling to one another and not fall properly to create the tentacle effect. Once separated, join them all together, placing them randomly together in a circle and stapling together.

Since you have two sets of four of the same cut, this is important that they not sit perfectly together or it won't look right.

Stick the tentacle staple up against the inside of the bowl shaped bag and push up with your hand. Collect all layers on the top, along with a string to hang if wanted, and staple. You can't see the staple on the ones I have up. The plastic folds over and hides it.
The layers are: TENTACLES
TOP OF BAG gathered together and folded over
[pic below]
BOTTOM CENTER OF BAG
STRING FOR HANGING
All are stapled through at once. I can now make them with just one stable through the whole thing, but it is easier to staple the tentacles first, then the top of the bag, then the combined pieces.

These are WONDERFUL!!
I'm so glad I came across the idea.
I think my process is MUCH easier than the original instructions, which used clear rubber bands. This is an original idea of Casa Haus English that her daughter created for a school assignment. She placed her jellyfish creation on a stick and used it as a movable puppet. Our jellyfish did the same, which is really cool, but with 2 and 3-year-olds, playing with plastic bags just doesn't work. So, ours are hung from the ceiling.

Tags: ocean, sea, theme, unit, preschool, kindergarten, child, care, childcare, daycare, beach, jellyfish, animals, craft, art, decoration, puppet, plastic, bag, trash, can, liner

TUTORIAL
I have received several emails about the bringing the "corners" together step, so have created the following tutorial.
A couple of things to note is that for this one I used smaller liners than the ones in this post, and I folded the first liner in quarters rather than opening it out and folding it in half, so the tentacles came out shorter.
Only the last staple is necessary. If you are making a lot of these, you'll probably get to the point where you can just hold it all together and only use the one staple.


Glad you enjoyed it, Sumathi! Another use for the product!
ReplyDeleteHi, Connie. I have a question about your jellyfish. How did you get your jellyfish's "body" to be so fluffy and the tentacles tucked into it? My finished jellyfish's body turned out very flat and its tentacles are hanging out of its body. Thank you in advance for your help!
ReplyDeleteI guess I made sure not to remove all the air. I pulled up the edges, kind of trapping air inside the bag, when I stapled the edges together and when I stapled the tentacles to the center. You can probably blow into it, either with your mouth or something like a bicycle tire pump, to fluff it out, then tape it to seal in the air better if necessary. Good question, thanks for posting, since that didn't happen to me, but may to others trying this!! If this doesn't solve your problem, please email me directly at littlestarslearning@gmail.com, provide pictures if you can, and I'll figure it out. They look really cool and are worth the effort, I promise!
DeleteThis is such a cute and cheap idea! We are starting a sailing/pirate theme unit in our children's and this jellyfish will make a great addition. Hopefully mine turns out as cute as yours!
ReplyDeleteDo you have a YouTube tutorial? I'm having some problems getting mine to look like this..
ReplyDeleterose did you have the two corners pointing at the top too? I'm not sure if i'm understanding the directions where she says " open up the liner bag and connect corners"
DeleteI'm going to try this. If anyone ran into problems and solved them, please post. I think the challenging part is to get enough air in it to be full and fluffy. I might get creative and start with 4 clear balloons attached to the top inside of the liner in order to encourage the fluffy effect. I'll post if it works
ReplyDeleteI can do balloons because i need it to only last a few days for decor so not sure if will work for all.
ReplyDeletewhen i open up the trash bag and connect the corners like you said, i have points where two corners are. What am i doing wrong?
ReplyDeleteMy first try turned out pretty well, but need clarification on the 2nd bag. After you cut off the sealed edge and unfold it, then fold it over once to create 4 layers of plastic, the shape is a rectangle not a square. Do you make any additional cuts to the sides before cutting into a spiral? Thanks.
ReplyDeleteYes, I round off the corners either before or after cutting the spiral.
DeleteThis looks so great! I'm putting together decorations for our Cub Scout Blue & Gold Banquet "Cubs Under the Sea." I want to make it seem like everyone is actually under water, with things like coral, fish, and jelly fish swimming around them. I was planning on making jelly fish from paper lanterns and plastic table clothes, which would cost roughly $4.25 for three jelly fish, while yours only cost five to ten cents each! I am seriously thinking of taking back at least half of the dozen I bought today and making yours too. Since I found photos of jelly fish that were orange, blue, pink, and white or see through, I would still like to keep some of the paper colored lanterns, to be able to have the colors of the ocean too. What do you think? This is an affair for eight boys and their families and is our big deal of the year. I'm definitely coping your email address, in case I have problems making these! I'm usually pretty good at recreating something I can look at and figure out how to make. Reading directions with just a few photos is quite a challenge for me though, so I'm just a little worried I'm going to be challenged when attempting to make these!
ReplyDeleteJust a thought, I read where someone suggested putting balloons inside the jelly fish. Could it possibly work out to use colored balloons to make the various colored jelly fish you would find in the ocean?? Like I said, just a thought.
ReplyDeleteI have added the Youtube tutorial that should make the direction much clearer. Thanks to everyone who emailed and I'm glad you like this craft so much.
ReplyDeleteThis is just what I was looking for! Thanks for the tutorial.
ReplyDeletenice
ReplyDelete