Friday, May 31, 2013

Spring/Garden Sensory Bin

Little Stars Learning

The children have loved our spring sensory bin.


Potting soil is heated to kill bacteria and other organisms, so it is great as a sensory bin filler, AS LONG AS IT DOES NOT HAVE ANYTHING ADDED such as fertilizer or water gel. You want the cheap-o kind.


The components and their learning activities:


FLOWERS AND BUTTERFLIES:


  • Matching by color
  • Grouping
  • Pretend pollination
  • Flower pot creation
  • Fine motor
  • Plant physiology
  • Botany
  • Biology

We tried making tissue paper flowers, but it was a craft FAIL, so I went ahead and bought silk ones at the dollar store. We made the butterflies, instructions at the end.

FRUITS & VEGETABLES with LABELS 


I gathered the plastic fruits and vegetables from the play kitchen. I went on-line and pulled images listed as FREE from the internet, printed them out, laminated, and adhered to craft sticks. I tried to make sure every growing type [vine, underground, above ground, etc.], and every type of edible part [root, leaf, seed, flower, etc.] was represented at least once, and preferably more than once.
  • Sorting by item
  • Sorting by type 
  • Graphing
  • Fine motor


FLOWER POTS


For ideas, I suggested that they could sort the plastic items into the pots by the size they actually become, or the plant labels. "Which pot would a watermelon go into? A radish?"
  • Sizing
  • Sorting
  • Describing
  • Fine motor
TOOLS


Scoops, cups, spoons, tweezers, containers, scrapers...


Tongs, funnels...and they had access to all our other sensory bin tools as well. These were just the ones I initially placed in there.
  • Fine and gross motor
  • Quantities
  • Logic/reasoning
  • Observation
SUN

Since the purpose is to discuss growing plants, I dropped a yellow balloon from the ceiling over where they played with the sensory bin as the sun. They thought that was great. We also got out the spray bottles and "rained" on the garden a few times.
  • Biology
  • Botony
BUTTERFLIES
We didn't have a fuse bead butterfly template, and I wanted them to be large enough not to easily break, so we used our heart template.


I fused one side, then they did the other. I fused that one. We made a circle for the head out of black beads which I fused and removed, then fused them all together between parchment paper.


It's a wonderful fine motor activity.


There are many activities they can do with this sensory bin, and they are still wanting to play with it a month after I first put it out...


Tags: sensory, bin, fine, motor, spring, spring sensory bin, garden, theme, unit, plants, growing, planting, gradening, farm, farming, crops, vegetables, fruits, labels, signs, flowers, child, care, daycare, preschool, pre-k, camp, summer 

Friday, May 10, 2013

Garden Totems


Saw these amazing garden totems on Pinterest, that I loved! Unfortunately, the link takes you to a Tumbler account that makes it nearly impossible to find the photo again, and there is no source information. 


Although the pin comment says "plastic and metal lids, the original looks to me to be made out of cut wood pieces. There are too many different shapes, they fit together too well, and the colors are the same for very different shapes and sizes of layers, leading me to believe they were painted, not found. If you are making a permanent sculpture, that may be an option if your woodworking capabilities are up to it.

For us, though, cheap and easy is how we fly. I think this one came out VERY similar in overall idea.


I've been having my clients, family and friends collect lids for me for almost a year. Not for this project, but for something else entirely. Now I need a few hundred more for several projects. 

SUPPLIES:

Block of wood to drill atop
3/8 inch spade bit
Adjustable pliers large enough to hold caps
5/16 inch diameter 4 foot long zinc coated steel rod

I had everything else, and purchased the rod at Home Depot


While using my Dad's drill press would have been NICE, it's buried somewhere in one of their outbuildings. Not wanting to pay $1400 for one, I thought this would work JUST FINE. And it did.


Many of the lids have a center point that is apparent due to the manufacturing process. Those that didn't, I just guessed. The spade bit has a sharp point, so it's easy to get it set in the plastic. I found that going slower was better. It left a cleaner edge. Going too fast caused the plastic to tear up and not cut off cleanly. For those I took a utility knife and cleaned the edges up.


When done, I had a basket full of items and some plastic confetti to clean up. It took less than half an hour to do all these. That may be stretching it pretty far. We were hanging outside and I had other things going on and didn't time it. Enough to say it didn't take long at all.

With the rod being 1/16" smaller than the holes, the children are capable of easily taking the items on and off the rod. The rod is high enough not to take an eye out, but low enough that the 3 year olds can all reach well enough to get the items on and off.

We used found lids, but I also added in:

  • Mustard bottle
  • Ball pit balls
  • Mega blocks
  • Bottle nipple caps
  • Plastic cups and plates 
  • Used bubble bottle
I'm now on the look out for any type of lid or container with an interesting shape or color. We have enough to do another one, and I plan on having 3 in the garden once the garden is set up properly. Since this is an interactive children's garden, they can freely take the totems apart and put them back together in an endless variety of compositions. 


My client, Jen, who has been my secondary source of lids and is amazingly creative and smart, was the one who mentioned leaving some of the drink lids un-drilled and using the straw holes instead so that they would sit off-set. We did that. They fit on the rod perfectly. The children mentioned that it looks like a flower where we did those. It adds a great additional dimension to the totem.


The children LOVE this activity. Of course, it's new, but since it will end up different every single time they play with it, I think it will end up being a great addition to our outdoor play space. They like taking them off just as much as putting them on.

SKILLS:
  • Fine motor
  • Gross motor
  • Artistic expression
  • Geometry
  • Spatial relations
  • Symmetry
 Tags: outdoor, play, playground, garden, preschool, pre-k, child, care, daycare, gardening, art, craft, totem, plastic, lid, lids, sculpture, artistic, create, fine motor, skills, child, children,

Geoboards

We love our geo boards! This is a free choice activity for the children from the age of 3.


For older students, geoboards are used to work more advanced geometric concepts such as translation, rotation, reflection, coordinates, scaling, congruence, etc. 

For the preschool crowd, I just let them explore. 
For them, geoboards work:
  • geometry [of course]
  • concepts such as horizontal, vertical, diagonal 
  • counting
  • unit measure
  • area & perimeter
  • angles & sides
  • line manipulation to form letters, shapes, numbers
  • concepts such as greater/lesser, more/fewer, bigger/smaller
  • spatial awareness
  • force and elasticity concepts
  • propulsion and trajectory, sometimes
  • fine motor


I just purchased new rubber bands from Harbor Freight, and I wanted to get it out there that these things are WONDERFUL! They are colored by size and the sizes are perfect for the geoboards. They are about 3 TIMES thicker than the ones I had previously purchased from an office supply store. They are much easier for the younger children to manipulate. Unfortunately, they are only available in the store, not on-line.

 item #60651 for $1.59
They have enough elasticity that they hold even when on smaller units, but easily stretch out farther, unlike other brands I've tried that either were extremely loose if not on the proper unit measure, snapped when over stretched, or were difficult to manipulate for the 3s.

I got a dozen geoboards on a clearance deal. If I hadn't, then I'd definitely be making my own like the ones over at Mama Jenn: Making Your Own Geo Boards. I also like her idea of using girls hair elastics in place of the rubber bands. 


If you don't want to use push pins, then bolts and nuts can be used on pegboard like the one made by mom.run.craft: DIY Geo Board.


If it weren't for having to keep the rubber bands away from the under 3s, then I would definitely be creating an outdoor geoboard. Just use grid paper to mark it out and pound nails into an upright log.  


There is also a FREE geoboard app that I am downloading for my students.


iPhone Screenshot 1
Tags: math, early, mathematics, concepts, geo, board, geoboard, rubber, band, rubber bands, counting, geometry, lines, angles, shapes, numbers, fine motor,

Wednesday, May 8, 2013

Wire Shelf as Big Book Holder


We do a LOT of movement activities during book readings. While I try to do the movements and hold the book at the same time, I have found that if I clap my one free hand against my leg, then the children will as well, even if they KNOW they should clap properly. Usually I prop it on my feet so my hands are free, but that doesn't work so well if we need to stomp, etc. So a book holder was an absolute must when I revamped the circle time/school area. 

I have a wonderful, HUGE, easel. Unfortunately, it has a little bitty ledge that simply will not hold my big books onto it, or any book that won't lie perfectly flat. It also takes up a huge chunk of real estate that I simply can't spare here. I've been racking my creativity trying to come up with some type of book holder that would


  • Hold the book, even it was a little ungainly/floppy
  • Not have a lip so high that it was difficult to turn the pages without tearing them on the bottom unless I lifted the book up for each page turn
  • Could also be used for normal sized books
  • Wasn't intrusive into the area
  • Was safe if the children tried to climb on it
  • Didn't have sharp edges
  • Would be at a good kid eye-level if they were sitting on the floor

I finally came across this PERFECT solution. Even more perfect, because it was almost FREE, since I already had the shelf and just had to buy the holders.


It holds our big books wonderfully!


It holds the regular-sized books just as well.


This is great because it not only takes up zero real estate, it acts as a barrier to anything I don't want the littler ones to get into readily. It easily lifts up for access the stuff stored behind.


I intended to make a metal or wooden arm that I could fold down from the inside of the cabinet to prop the shelf out at an angle, but I've found that my storage containers provide the perfect angle by pushing the bottom edge out 3 1/2 inches from the shelf. I just prop one behind it when it's time to read. 


Since it only sticks out about an inch on the bottom edge when fully vertical, it doesn't seem to get in the way at all if the children are doing activities on the counter or working on the white board. 


This shelf is approximately 16 inches long. I used a touch of super glue in each of the end caps to make sure they wouldn't pop off to become choking hazards for the littler ones.


I was looking for metal C pipe clamp holders such as this one, but Home Depot didn't have any small enough, though I know they make them. We have some SOMEWHERE at the farm, but I couldn't find them.


Which ended up being a good thing, because I much prefer the ones I got. They are called P Type Rubber Lined Hose Clips Pipe Clamp and Home Depot carries them in the electrical supplies area. They have a soft rubber surround, but a strong metal core. I put them in with some large hefty screws, I believe they are #10s. These shelves are real wood, not particle board. If using particle board shelves, you may want to add an angle bracket or a solid wood piece to secure into.


Tags: reading, read, book, holder, easel, center, circle time, circle, read aloud, storytime, story, time, teaching, preschool, child, care, daycare, pre-k, kindergarten

Monday, May 6, 2013

Stealth Schooling - Bait, Hook, Reel, Release


Whether I'm teaching my advanced preschoolers or my own children, I have always believed that so much of what a child learns can be introduced softly, allowed to play through their minds, gaining meaning and understanding, rather than slammed hard in a pressure situation resulting in a right/wrong test. 

This belief is one of the reasons I was drawn to homeschooling in the first place. 


Now, that philosophy and practice has been given a term that I think is very appropriate...stealth schooling.


BAIT

My oldest son is gifted,  along with some of the preschoolers I have and am teaching, and especially with these children, once their interest is caught in a subject, then it's an exciting voyage of discovery. 


A LOT of our learning is done through play and usually at their instigation. I was describing my process last evening to a client and said I basically begin to dangle concepts around them, personalizing them as much as possible, because children are naturally self-focused:


  • "Wow, you have a blue jacket. Blue in Spanish is AZUL."
  • "You have 1 leg and 1 more leg, you have 2 legs. 1 and 1 is 2, 1+1=2."
  • "I wonder what that word is. Oh, it's AND, A-N-D spells AND. That's a good word. Very useful. Like...I want dinner AND dessert. Do you like dessert?"

It's a blanket of concepts that gently settles around them until they are ready to pick up a particular thread to follow in their own manner and time. 


HOOK

At some point, one or more of the children's interest and fascination will get caught by a specific concept and they will instigate instruction. They will ask questions, incorporate the concept into their play, try to explain the concept to other children, and actively seek knowledge and experiences pertaining to it.

The KEY is to be present and aware in the children's play and learning so that those pivotal moments of leaps in cognition are readily identified. I continually evaluate the child's depth of interest and if the concept is one they truly wish to explore further or just have a passing question about.


REEL

Instruction is the tether to the teacher, the line. A good teacher knows that it is a give and take, a dance to keep the child interested and involved so they don't abandon a concept due to boredom, frustration, being challenged beyond their capabilities or getting hurt emotionally through right/wrong instruction. It is a dance of exploration and instruction along with down time for thoughtful contemplation and review, in time to the child's learning rhythm. As the child's understanding of a concept matures, more instruction is used at the back end than the front.


RELEASE

In a fishing analogy, landing the fish would be mastery for the child, and once taught, we let them move on to be fascinated by some other enticing concept or to use their new knowledge to scaffold to the next higher level. They move on, with greater knowledge and experience, to build upon what they now know.


EXAMPLE

For instance, Spanish colors and counting was instigated in the ball pit this week.


As I mentioned, I randomly point out colors in Spanish. No direct instruction, just BAITING.


We all were in there (yeah, it's that big), and one of the girls held up a ball and asked how to say purple in Spanish and the other held up a red one and asked the same with enthusiasm. HOOKED! SO, that's how we began Spanish instruction on colors.


The REELING began. They kept holding up different colors of balls for me to identify and they repeated the color after me. After a while, I started calling out colors in Spanish and they had to find one that color. If they held up one that was a different color, I simply said the correct name and the child would continue searching. 


As it progressed, I scaffolded the learning to asking them in Spanish, to find a specific color. They knew what I was requesting, and it was an easy translation. If you asked outside of the context, they couldn't tell you what "¿Dónde está una bola roja?" meant, but again, it was stealthily getting new Spanish vocabulary onto their radar.


Eventually, one of the girls came to me with her arms full of balls and asked me to count them in Spanish, so we did, and then that was the new game. 


They had heard the words before, as I randomly speckled their environment with them, so it wasn't a totally new concept or NEW words. Simply through exposure, much of the basis for this concept had been absorbed, so we are just neatly aligning information they already had available, and filling in any holes, to create a finished concept.

I imagine by the end of the month they will have it pretty much down through their own explorations. Then they'll move on to some other fascinating subject.


I think that is one of the things the school system does incorrectly. They present children with a new concept and expect them to get it through direct instruction in a specific time frame designated by an adult.


Learning is a process, and that process and it's time frame is different for each child.  


For more information on Stealth Schooling, please check out the great blog posts at http://giftedhomeschoolers.org/blogs/blog-hop/.
tags: stealth schooling, stealth, teaching, instruction, preschool, curriculum, homeschool, homeschooling, blog hop, 

Friday, May 3, 2013

5 Reasons for Themes


"Theme based teaching is not inherently evil!"
Lisa Murphy, Ooey Gooey Inc.
 
Theme based teaching does, however, often get a bad rap. So here are a few of the reasons that I LOVE theme based teaching.

Emergent curriculum, letting the children's interests guide the learning process, is touted as being the best. While I thoroughly agree that all emergent curriculum should be explored, if a child or group of children are REALLY into some topic, then it does need immersion, I also believe that any child care or preschool setting is limited by its hard structure, resources on hand, funding, and the creativity of its employees. 


I also believe that children under 5 have sufficiently limited experience that exposing them to new and interesting themes is to their advantage, and here's why...

#1  Themes enliven the environment.  

Themes provide a rallying point for every administrator, teacher and child to explore the endless possibilities of the current environment for re-purposing towards the theme. New items are borrowed, created, or bought that expand the learning experience. 

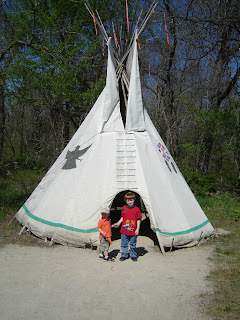
For instance, a teacher may bring in a tent for a camping theme, which would have never otherwise been brought in, and many children, especially young children and those that live in the city, may have never seen or felt one before. The same for hay bales for an autumn or farm theme, tadpoles for a pond theme, live hermit crabs for an ocean theme, saddle and for a cowboy theme, etc. 


Fairy Tales theme - Princess and the Pea - used every blanket available and a tennis ball first then a ping pong ball as the "pea" to feel

#2 Themes allow children to explore beyond limited experiences. 

They may have read a book on the circus, maybe a few children have been to the circus, but they really have no idea what all the circus entails. Even though it may be an interesting subject to them, they have no idea how to go about exploring it and wouldn't even bring it up as a potential topic on their own. As a theme, their opportunity to learn, play and investigate is vastly expanded through the teacher's experience.

Circus theme - lion tamer and lion during our finale performances
#3 Themes provide inexperienced teachers a starting point and a format. 
While an experienced teacher may be able to easily pick up on emergent curriculum from her students and immediately create some songs and fingerplays, pull out books from her vast collection relevant to the topic, create some file folder games and art projects, along with math, science and reading centers...that isn't so easy for the majority of teachers. Themes allow for thoughtful pre-planning of relevant curriculum, learning objectives, environmental set-up and potential field trips.
 
Dinosaur theme - paint with dinos
#4 Themes direct the prudent allocation of resources. 
If a teacher has a set of themes in which she can fully invest for the long-term, then the purchase of more expensive manipulatives, games, and resources can be justified, since they will knowingly be used over and over again, rather than getting lost on a back shelf in a closet because they have no specific relevance.

For instance, I use the game Log Jam every Groundhog Day, during our pond theme, when we discuss weather/water cycle, and it may come out for themes such as zoo, habitats, rodents, etc. 


8 pumpkins/squash of various sizes and textures bought for our Fall theme

#5 Project or theme-based learning makes sense. 

For children, immersion in a topic helps every aspect of that topic to combine into a cohesive collection of information. Studying clouds, acting out the water cycle, building a rain gauge, graphing the rainfall, doing erosion experiments in the sand and water table, studying ice/water/steam, all during a specific amount of time through a specific, well-planned, scaffolding curriculum, based upon play and hands-on learning, enables children to really get their minds wrapped around new concepts, ideas and experiences. 


Tiki Man craft during Hawaii/Luau theme

I LOVE THEMES!
They make my job even more fun and enjoyable.

However, the downfall is if teachers use themes as simply a topic, rather than an immersion experience. 


THEMES SHOULD NOT...

They should NOT be a crutch. Good teaching comes from reading your students and responding to their educational and emotional needs. Some weeks we go without a theme because we are into some learning concept that doesn't work well with one. Eventually we get beyond that,  I throw out a few theme ideas for them to choose from, and we delve into one.


They should NOT be a topic for worksheets. Worksheets are for children over the age of 8! No color-by-number,  addition worksheet with a little theme icon in the lower corner, or "C c C c circus" writing etc. 


They should NOT be a few token activities without any connection or relevance. The whole beauty of a theme is interdependent learning opportunities. 


They should NOT be the SAME activities, only with a different theme.  Musical chairs AGAIN, only this time with animals on the seats, or foods, or transportation vehicles, etc...


They should NOT be rushed through with an uncompromising agenda. As with any curriculum, children need to be allowed to THOROUGHLY explore and investigate any aspect with which they become enamored. If it means extending the theme into an additional week, or two, then give them the time they need to learn. 


They should NOT be blanketed upon uninterested children. If a theme isn't working to hold the interest of the children, or teacher, then it needs to be abandoned and replaced. Age, maturity, attention span and interests of each and every group of children will vary dramatically. What worked great one year may totally flop with the next group. Move on. Don't beat a dead horse. 


By the way, Lisa Murphy's article on curriculum planning is excellent. Please go read it!
Tags: preschool, daycare, pre-k, child, care, theme, unit, curriculum, planning, 
Tags: teaching, child, care, daycare, preschool, pre-k, curriculum, planning, theme, themes, unit, homeschool, homeschooling, emergent, lesson, lessons, learning, education, ece, early, childhood