Monday, August 19, 2013

Homeschooling - When and How

Parents begin teaching their children from the moment of birth. Supporting that learning, expanding upon their experiences and knowledge, is homeschooling. It begins early, and flows into childhood. Every parent does it, they just may not view it as such. 


When my oldest was 18 months, while visiting with my parents, we realized that he had been too quiet for too long. We found him with a phillips head screwdriver methodically taking apart everything he could reach.

We told him he needed to put everything back together, and he accurately put every screw back into where it belonged. Door hinges, door knobs, metal floor thresholds, the back on the remote, some of his electronic toys, etc. He had devised boosters where needed to get up to where he wanted, some of them quite inventive. We watched him reassemble each one.

Little bro taking after big bro!
Yes, screws are choking hazards, yes, batteries were uncovered that could have harmed him, yes, he exposed electrics that could have harmed him, yes, he could have poked his eye out with a screwdriver. 


But it was what he was led to do. 

It wasn't the first time that my little guy had shown an innate NEED to figure out how the world works around him. So we provided him with a variety of things he COULD take apart and put back together as he chose and proceeded to supervise him closely, offering a straight screwdriver when needed. 

While I had supported him in every quest to learn, this was truly the moment when I knew, looking into his serious little eyes, that if I took this opportunity to explore away from him, a part of him would be lost. Possibly forever. I've had that gut feeling many times through the years, and unfortunately, along the way, especially when he was in public school, pieces of him WERE lost because he didn't fit the mold.

I think schooling at home, beyond the support of traditional baby-hood learning, begins when a parent recognizes that NEED within a child to explore, know, experience, and truly UNDERSTAND beyond their capabilities or environment. 


All children have this innate desire, some more so than others. But ALL children have their passions, whether that be trucks, trains, princesses, horses, machines, or nature. Finding that subject of passion sometimes takes exposure through books and outings. 

For instance, my cousin's 3-year-old just went through an animated dinosaur exhibit this last weekend. Now she wants to know everything possible about dinosaurs. 

Her parents bought her a coloring book from the gift shop and are picking out library books and hunting down video on dinosaurs. She is advanced, most likely gifted, as both her parents are, so they can continue to add resources applicable to her interest and development until her interest wanes, if it ever does.
THIS IS HOMESCHOOLING!! 


Depending on the family, this flow of teaching may remain in "project-based" exploration, become more child-led with maturity and be termed "un-schooling," or morph into more organized set curriculum. 

My oldest indicated even in preschool that organized schooling was not for him. His teacher said that he would leave the class. Not physically, but mentally, he'd fade out and they had trouble getting him reconnected. She said he would get bored and simply go away. I asked him where he went in his head. He said, "My happy place. School makes me sad."

While I wanted to homeschool, knew I NEEDED to homeschool my 2e gifted child, because the school system quickly began robbing him of so many things and shutting him down from the world, I couldn't work out the logistics.  

We struggled with public school for years, trudging nightly through homework he felt tortuously repetitive and boring ,until I would give in and let him work on what he truly want to work upon, usually some form of science, often physics, which I facilitated...homeschooling in the evenings. He learned more, retained more, and was HAPPY learning this way.

When he finally was able to homeschool, it was as if the sun shone on his soul for the first time in years. We could work around his good/bad days. He could race through what he already knew, spend some extra time on anything he struggled with, and be done with his day with plenty of time to explore his passions. 


The youngest has only been in public school for one grade, fourth, and it didn't go well. His passion is coding and programming, subjects he would not be exposed to through the school system, at his level, until college. His reading, math, and science skills are advanced not due to his intellect, but due to his profound need to constantly learn more, to create better programs, and push his capabilities.  

Homeschooling DOESN'T begin at a desk or with a worksheet.

It all starts early, with that first moment that a parent sees a driving need to learn within their child. When a parent makes the choice to provide inspiration, motivation, and means to open the door to knowledge.

We read a lot of worm books that week!
It doesn't take a lot of time or money, unless you have them to spare and choose to do so. Free resources are readily available and there is a multitude of support within most communities, and if not yours, then others that you can outreach. If you are called to support your child in their learning, find a way. 

Coop with other homeschooling parents if you need to work. Homeschooling can be accomplished at any time you can make available, and children are often their own best teachers if given resources to explore. 

Our vet has a 12 year old homeschool girl that shadows their vets for 4 hours 3 times a week. He says she knows more than most 2nd year veterinary students. That's her passion. If you seek resources, you will be surprised how the community will provide.

There is a reason "JUST DO IT!" is such a popular slogan...

Tags: homeschooling, gifted, education, home schooling, homebloghop, school, passion, chi
The Gifted Homeschool Forum is keeping a running list of the other “Homeschooling: Where & How to Begin” links as they are submitted.

Below you will see that ANY PARENT can homeschool successfully...


Homeschooled: How American Homeschoolers Measure Up
Source: TopMastersInEducation.com ldren, parents, child, learning, 

Friday, August 9, 2013

Yarn Art - Painting and Texture

This is another one of those seemingly simple activities that I end up finding complex skills emerging during the process. This is definitely PROCESS art, although the product is pretty wonderful.


I LOVE this paper. 
  • First, because it is FREE. In this economy, whether you are a teacher or parent, FREE is ALWAYS good. I'm constantly surprised by the things people throw out for which we find some amazing uses. Look around you, and hit up everyone you know for anything they think you could possibly use. You can always pitch it if you can't use it. These are a shipping topper to Doug's game tickets, so he collects many each week. 
  • Second, they are a heavy card stock with one side slick and the other side matte, giving us many options and holding up well to any project.
  •  Third, they are a great size, 8 X 16 inches. The children can easily reach to the top of the paper and to the supplies in the center of the table without standing up or leaning so far forward they drag their paint shirts or body parts into their projects.  
  • Fourth, they are still wide enough that the children can get a good-sized project accomplished but not so large that they don't easily fit as many as we need upon the table or become unmanageable for the children to carry about.

HOW TO
The first step was using a piece of yarn about 3 inches long, clipped into a clothes pin, as a painting tool.

Their inclination was to open the clothespin, which dropped the yarn, which left them with the dilemma of getting paint on their hands to place it back into the clothes pin or to just attempt to grab the yarn with the clothes pin. All got it back on through independent decision making, experimentation, and observation of their cohorts.


It also took some logic/reasoning skills for them to figure out that to load their yarn with paint, just dragging the it through the didn't get the job done. Using the tip of the clothes pin to smoosh the yarn all around in the paint and get it good and sopping, was MUCH better.


They started out dragging the yarn back and forth on their papers, and eventually started doing circles, curves, up and down, zig zags, and transferring the smooshing technique to color in areas.


The next day, we added our 3 dimensional component, yarn pieces, to the dried art work.


Working those scissor skills, the children began by cutting some pieces, dragging them through our glue sponge, and placing them on their art work randomly.


Soon into it, though, they decided the glue sponge was too icky and not getting enough glue on for them, and they wanted the bottles. With the bottles, they decided that putting the glue down FIRST, then placing the pieces or cutting the yarn TO LENGTH, was a better choice.


Even the youngest did a great job in assessing the length of the glue and cutting pieces appropriate in size. Excellent spatial and observation skill work.

They became more precise and intentional in their placement. This led to some more interesting textures and formations.


Miss H - "A Playground and Lips"
The finished pieces are pretty awesome!
I love the movement and texture.


Tags: art, craft, yarn, preschool, pre-k, kindergarten, Pollack, paint, glue, scissor, fine motor, color, rainbow, homeschool, child, children, children's, cut & paste,

Monday, August 5, 2013

Rules for Reasons

Parents, please don't make your toddler's life at child care, playgroup, Gymboree classes or any multi-child setting, any more difficult than it needs to be!!


As a child care provider and preschool teacher, I create...


While few and simple, they are very important for all children to be successful and SAFE.

When doing an introductory meeting with parents, I discuss how school rules need to be followed at home so that the child has consistent expectations and can trust his home and school environments to the extent that the child can make appropriate choices in actions and behaviors at both. 

There are some experiences I have had that really get this point across.
  • I had a 2 year-old hitting all the other children with large blocks, seemingly taking great glee in their pain, suffering, screams and tears. He was laughing and having a good time of torturing the others. Nothing stopped him, or even slowed down his seeming quest to attack everyone. I finally had to exclude him from the other children.
This surprised me, as hitting is the capital offense at school, with instant time-out and a stern lecture. He hadn't shown a penchant for it prior to this particular instance. In discussing this with his mother, showing the bruises and tears of the other children, she admitted that they had bought their boys play light sabers over the weekend and had a great time all beating each other up. "...it was so cute...he had such a great time!"


Unfortunately, a 2 year-old is completely incapable of reasoning between a play lightsaber against his 5 year-old brother and parents, and a block against the head of another toddler, or a stick into the eye of another child. 


Baby Boy Star Wars Nursery Art Jedi with red lightsaber Illustration Digital Print 5x7 sky blue
Artwork used with permission from Let's All Make Believe
Print available $12 from her Etsy shop
These parents, over a weekend, taught their son that hitting other people was not only okay, but strongly encouraged, attention getting and FUN! A recipe for child care disaster on Monday. 


Parental attention and encouragement 
will ALWAYS trump school rules.
  • I also see this happen with ball throwing around the 18mo-2yo range. A father was so proud of his son's strong arm until he threw a rock into the face of another child. Even after discussing this with the father, he didn't stop throwing with his son, he just tried to "teach" him to only throw balls. (Not going to happen at this age range.) The child was constantly in trouble at school for throwing. The father FINALLY decided to wait on the ball throwing until the boy reached at least 3. What was the catalyst for his abrupt about face? The child chucked a toy into his dad's private parts. The dad found out just what a good, strong arm his boy had on him.
This one happens FREQUENTLY...Dad's and their obsession with their son's pitching ability! GEEEEZ! 

Another dad did the exact same thing...didn't stop the throwing, and tried to "teach" his toddler to only throw balls, even after I relayed the previous story. This one didn't last as long, since his son decided to chuck rocks in the driveway, with all the strength his little arm could muster, at daddy's new Lexus while dad was showing it off to a friend. Within an HOUR of purchasing it! 


Unfortunately for him, the little boy didn't stop throwing all together as quickly as his father would have liked. A few days later, this dad got a golf ball into his private parts. The height difference between toddlers and fathers is perfect for this. 

I couldn't help myself: "Yep, he really does have a very STRONG arm, doesn't he? Imagine if that would have been a block against another kid's head."

Dad: "Yeahhhhh, sorry."
What I didn't say,

"TOLD YOU SO!"

But I wanted to!
This isn't just boys! My cousin was talking about her daughter playing pirate and hitting the dog with her foam sword and how "funny it was. We were dying laughing. The poor dog, though, was terrorized." 

I basically told her everything I've written here, and extrapolated it to a stick being hit against her baby niece. She immediately called over her husband and said, "NO MORE SWORDS!" I reminded her that it was only until Sadie showed some sound reasoning after she turned three. Not too long to wait.


 Child Pirate Costumes

Until a child's reasoning between objects and actions, and a semblance of self-control emerges, throwing and hitting, in any manner, in any form, of any thing, is a FIRM NO!! What is okay with an older sibling or parent, at home, is NOT OKAY in any multi-child setting.


It's simply not fair to the child to be reprimanded harshly elsewhere for something that is not only approved of, but ENCOURAGED at home. Every child wants adult approval, and they get very mixed signals when their parents and their teachers or caregivers have dramatically different responses to what the child perceives as the SAME ACTION.


Even worse, is when a parent has actively encouraged a particular action or behavior, and then, when it is done in a manner the parent deems inappropriate, harshly punishes their child. Praising and laughing for the child throwing a ball, then spanking them for throwing rocks at the car, is WRONG!


It's NOT FAIR. 
Tags: lying, children, development, discipline, punishment, toddler, preschool, childcare, daycare, parenting, parent, girl, boy, rules, consistency, behavior, tantrums, child, limits, care

Friday, August 2, 2013

A Moment of Teaching

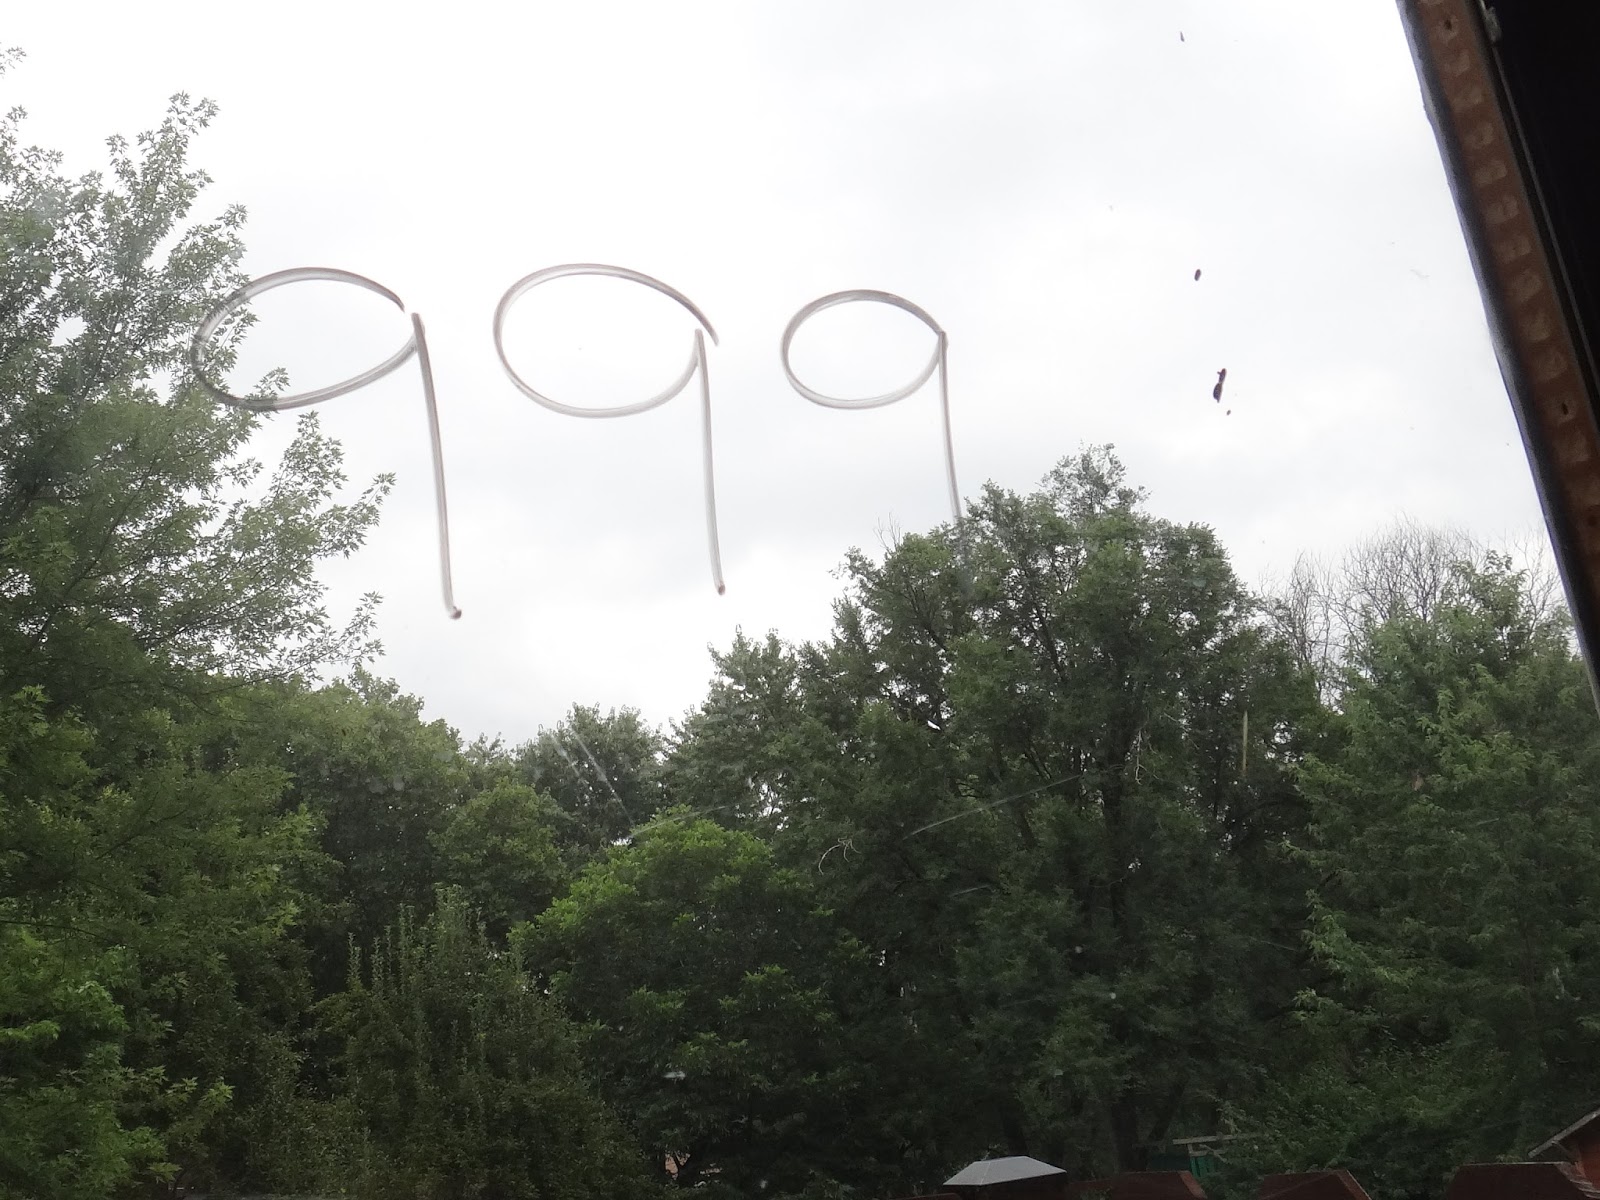
I walk over and write a number on the sliding glass door. By the time I'm done writing, the children have gathered from their various activities, drawn by curiosity. Miss A shouts out the number "83!" 

I erase it and write another number and point to the first digit "ONE HUNDRED" and underline the last two. Miss H shouts out "57!" 


"Yes, ONE HUNDRED...fifty-seven." 


They get the next several 3-digit numbers, up to 999, that I simply write up then erase once they say them. 


I walk off. They disperse. 


In less than two minutes, I have provided a second introduction to 3-digit numbers. 


Teaching and learning doesn't have to be time consuming or complicated.


The children all turned 3, 3, 4 and 5 within the last two months. 

Tags: preschool, pre-k, teaching, homeschool, homeschooling, math, numbers

Friday, July 19, 2013

Ready to Write?

"My 3 year old is learning her letters and numbers, 
is she ready to begin writing?"


My response, links in green:


WHERE IS YOUR CHILD AT?
If you can answer YES to all of the questions above, then your child has the ABILITY to begin writing.

Fine motor coordination/ability often develops much later than cognitive ability. A child's brain will work on building one skill set at a time. Their focus of learning vacillates between cognitive and motor skills. 


Gross motor ability is often mistaken for being an indicator of fine motor skill. This is simply not so. A child may be able to throw a ball with accuracy, but still not be able to feed themselves without dropping food all over the place.

Here is an excellent visual of the 12 stages of Developmental Progression in Children's Writing by Heidi Butkus. I couldn't have done it better, so I'm just linking to her's. I have this laminated on the wall above my desk.  http://www.heidisongs.com/Free_Downloads/assets/Stages_Of_Childs_Writing.pdf


Next to it, I have this Drawing Development in Children chart beautiful illustrated by Susan Donley.


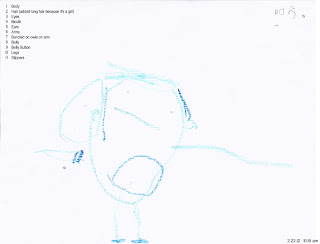
My Miss B's drawing at 3 3/4 years.
Click to open larger for detail
PRE-WRITING

Prior to any type of formal writing, a child must develop upper body muscle strength, trunk stability and gain some mastery of his fine motor skills. Developing the muscles is necessary prior to even picking up a crayon, let alone attempting to write with any accuracy. Much of the necessary development occurs during crawling. 

[Often older children, kindergarten and even higher, who lack upper body muscle, fine motor, trunk stability and crossing-the-midline development, will be instructed to crawl around.]

If the motor skills are in place, then they must still learn the conventions of how to hold on to the writing utensil, apply enough pressure to produce the desired effect, and get it to move in the desired way. All of this takes practice.


good visual to aid understanding of the writing process and fine motor development. - Re-pinned by #PediaStaff.  Visit http://ht.ly/63sNt for all our pediatric therapy pins
[Unable to follow this image to its original source. Link attached to image.]


Even at 1, these two are already using a modified tripod grasp. 
No instruction necessary.
Worksheets are not developmentally appropriate for children under the age of seven. YES, the school districts use them, but it is for convenience and assessment, not because it's right. Worksheets are not engaging, require too fine of dexterity for a child to be successful, and have a right/wrong outcome which can cause a child needing more muscle control to lose interest to the point of shutting down on doing any writing activity. 

'You need to work at staying on [in] the line better,' will shut a child down from wanting to learn how to write. 


Engaging alternatives include:
  • Salt/sand writing
  • Shaving cream writing
  • Paint/gel bag writing
  • Drawing with colored ice cubes
  • Drawing with sticks in the dirt
  • Finger painting
  • Drawing with pencils, crayons, chalk, etc. on a variety of materials/surfaces
  • Painting of any kind
  • Having the child trace with a wet Q-tip over letters or words written on a chalkboard
  • Tracing large letters, sandpaper letters, etc. with a finger
I have salt writing, paint bags, pencils, crayons, chalk and chalk boards inside and outside, Magna Doodles, and white boards readily available for the children to use as they will. They are encouraged to write in some manner all the time, and DO. It's not a curriculum, as much as a way of life, learning through play opportunities.

Frisbee, salt, unsharpened pencil, shape cards
Cards available with my Shape set $1.50 on TPT
During circle time, with the older preschoolers, we have a 5 minute writing time [child-led, so can go on for an hour if they want.] I encourage them to write their name on whichever media they choose, or at least one of the letters. We also have our number and word of the day, and it's a given that these are options as well. 

I do not MAKE them participate, however they are not suppose to randomly scribble. They may DRAW whatever they wish, even if they choose to DRAW a scribble. There is a difference.


I have three early learning goals that I begin upon as soon as a child is old enough to communicate.
  1. The understanding that they should have a purpose every time they pick up a pencil, pen, crayon, paint brush, etc. What are you going to draw? What are you drawing? What did you draw? Usually I will get three different answers on the same drawing until about age 5, which is fine. The goal is to get them THINKING about their PURPOSE. 
  2. The understanding that they have something worthwhile to communicate, that anything they write or draw has meaning. "Tell me about your drawing. May I write this down?" 
  3. The understanding that written words have power. They can tell a story, organize a list, advertise products, provide information, convey meaning, and most importantly, immortalize the child's thoughts.
SHOULD YOUR CHILD 
BE WRITING?
  • Do they like to draw?
  • Do they ask for you to help them write their name?
  • Do they inquire about print?
  • Do they attempt to write lists, books, menus, etc. during play?
  • Do they ask you to write for them?
  • Do they have stories to tell about their pictures rather than just a statement?


Fine motor tasks can be very frustrating for young children. The success of any new skill set is dependent upon the child's interest and motivation. 

Usually, the first thing a child wants to learn to write is their name. By picking a single letter, the simplest one, to begin upon, you increase the chance of the child's success and interest.


STICKS AND BALLS

When we begin writing, once I begin to see the indicators listed, then we start with sticks and balls. A, C, E, F, H, I, L, O, P, Q, T, a, b c, d, e, i, l, o, p, q, t, are all letters that can be made with sticks and balls with no cross-overs or looping. 

Q they usually make in the beginning with the line going straight down. It gradually moves to a diagonal, and that's when I know to begin on the cross-over letters and loops.  


Sticks and balls heads outside with us, where it often becomes sticks and rocks, string and leaves, shoes and saucers, etc.. You'd be surprised how many play items can be utilized to create stick and ball/line and circle letters.


PROGRESSION

Each child is vastly different in temperament, motor skills, cognitive skills and interests. I am not looking for them to reach specific levels of progress within a specific time frame. I simply look for some indication of forward progression. 


That is not to say, however, that skills won't take a backward turn. This is especially true when life upheavals or new paradigm shifts take place for the child. I always work from the place the child is at currently, rather than looking to where they have been, when there is regression, or create any pre-conceived idea of where they SHOULD be. 


None of that matters. 

As with any education, it matters only where the child is AT and where the specific child is currently heading.

If your child IS ready to write, you may be interested in my blog post on Teaching Penmanship.


Tags: writing, fine motor, child, motor, tripod, grasp, drawing, coloring, art, craft, instruction, early, age, progression, pre-writing, write, name,
 letters, formation, letter, number, 

Wednesday, July 17, 2013

Tape Resist Letter Canvases

I totally dropped the ball on Mother's Day and Father's Day gifts this year, since we were spending all of our time outside this spring, so I've been wanting to do an art project that was more a keepsake than our normal process masterpieces.


I think we nailed it! While this is still basically our normal process piece, on canvas, with the first letter of their name resist, makes it a frameable and displayable art work.

I bought the 11 inch x 14 inch canvases at Walmart for $4.97 for a 3 pack. They also had 8 x 10, 12 x 12 and 12 x 16 sizes.


I've been wanting to try the new Frogtape, which is coated with a gel that supposedly won't let the paint seep underneath like the blue painter's tape often will. It caught my curiosity. Since my dad had a commercial painting company I worked at when I was right out of highschool, I knew the limitations of the blue tape and was not a fan.

Most of our activities are process-oriented, and I really didn't hold out much hope that this one would turn out well. However, the Frogtape did an excellent job, even with the children running trucks over it and mushing paint all over.


I used a 2 inch top and bottom margin and 1 1/2 inch side margins to space out the letters and used a craft knife to cut the tape cleanly with a metal straight edge. 


Since I didn't want these to be a mass of gray and brown, we did color mixing in batches. They first painted red, then blue, mixing into purple. I cleaned all the tools, and even took a blowdrier to the paintings to "set" the colors.


Then we moved on to yellow/blue/green after which I cleaned the tools and dried them once again. Then on to red/yellow/orange.


Even the littlest ones participated, but their attention spans only made it through the first set of colors. We will be going back to add the rest of the colors and finish theirs through the week.


The children were asked to choose a different texture tool for each color, but of course kept coming back to their favorites. They did well at sharing between them.


 They were encouraged to work in the white spaces and to cover the canvas, only not all at once with the same color.

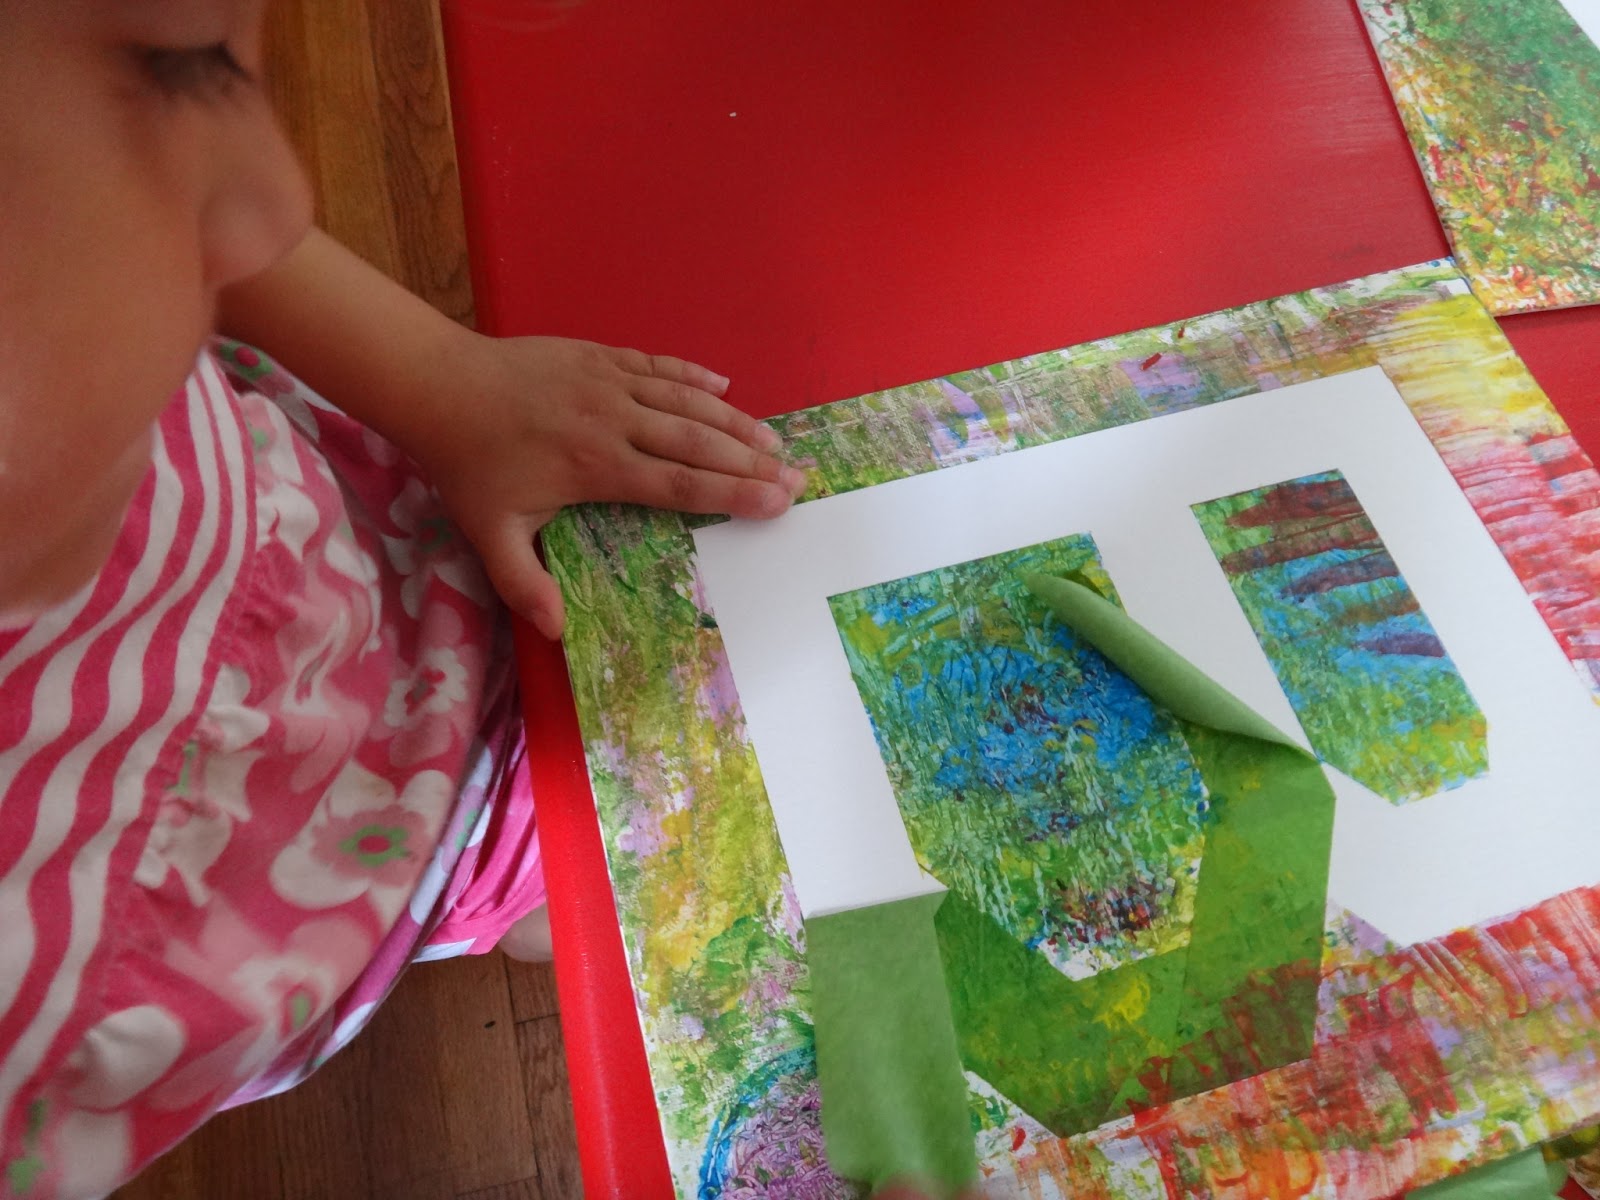
The next day, we came back and the children removed the tape. It was a wonderful surprise for them, as we had not done this before. The first question, of course, was if they got to paint inside the letter now. That would be a "no!"


To ensure the white stays white, I sprayed each canvas with clear lacquer 


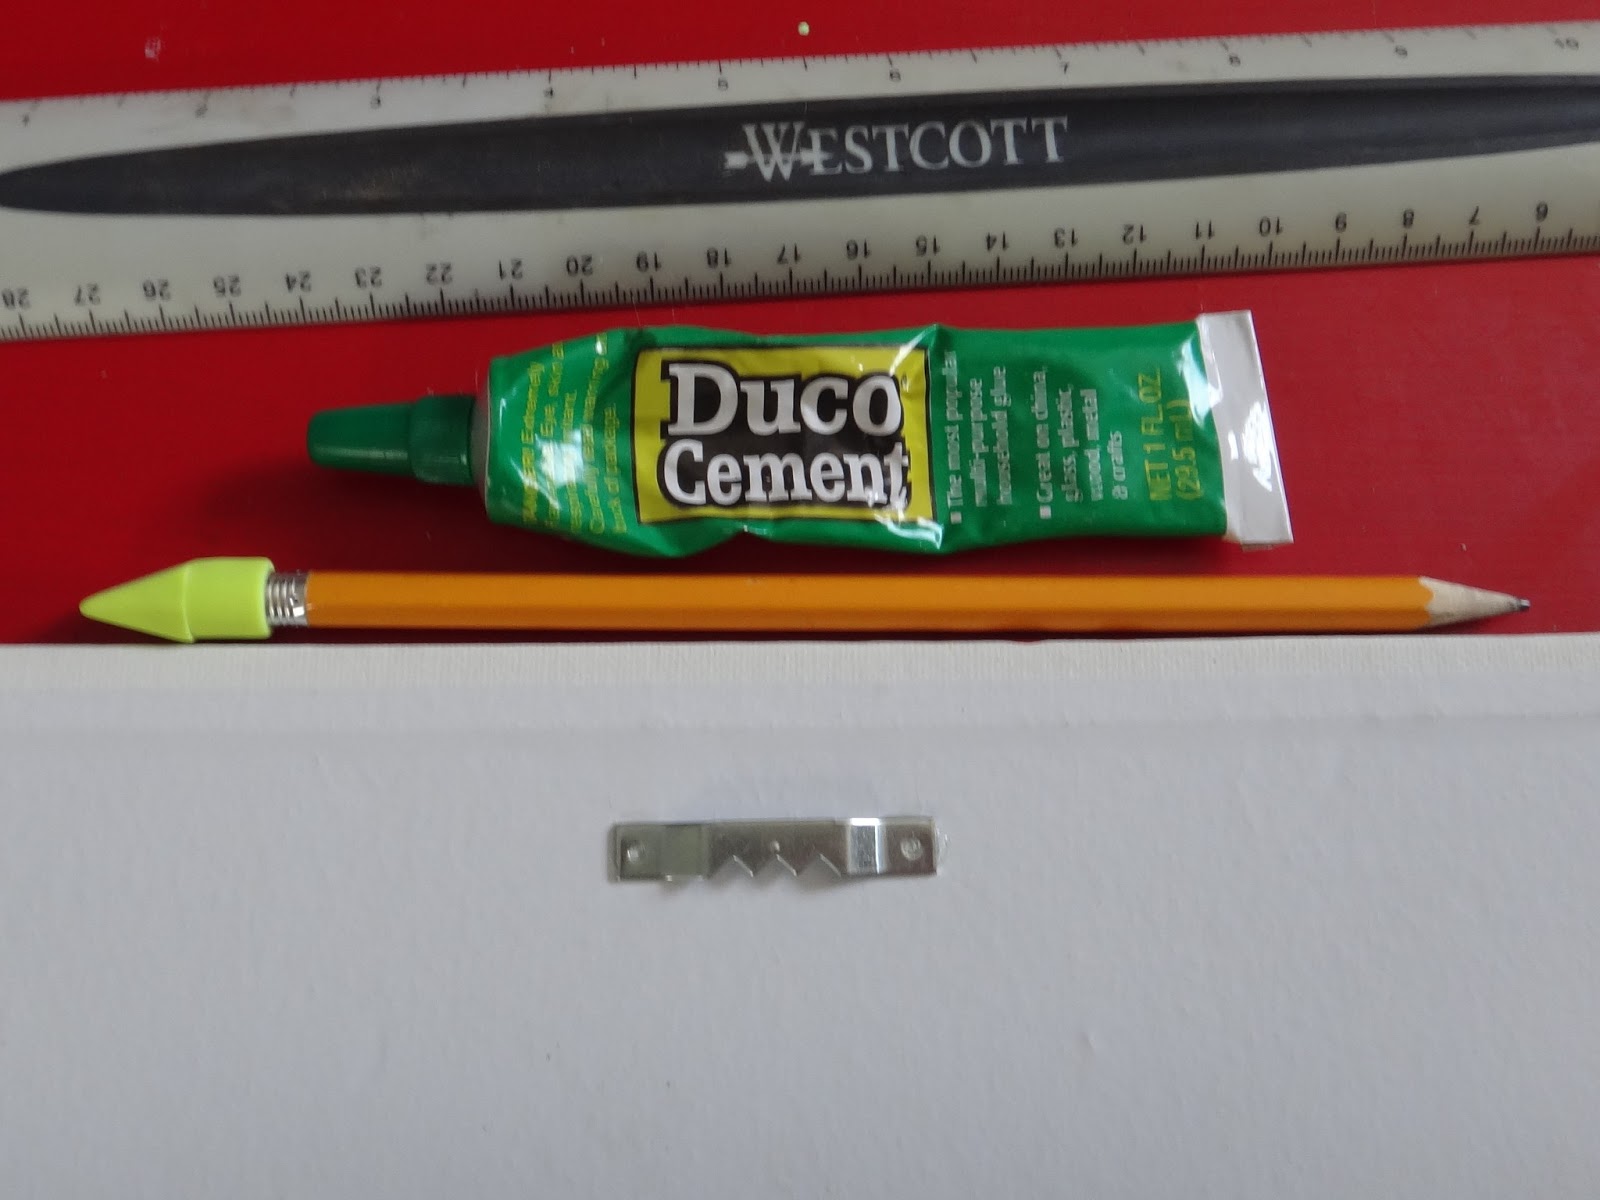
and added a sawtooth hanger, centered and about an inch down, to the back with super glue.


This was a great activity with a great result.

Tags: painting, art, canvas, preschool, pre-k, daycare, child, care, homeschool, tape, resist, letter, alphabet, process, product, name, mother's day, father's day, grandparent's day, christmas, present 

Friday, July 12, 2013

Our Preschool Art Studio

After years of having art and craft supplies strung throughout the house, this year I took the ground floor spare bedroom and made it into our art studio. It not only serves my students, it serves my own creative endeavors as well.


I can't describe how wonderful it is to have a child suddenly ask, "Can I add glitter to this?" and be able to simply ask, "What color do you want?," reach behind me, and present them with the necessary supply to enhance their creative vision. Every time it happens, I smile and sigh.


This is a LONG posts, so skim it as you will as I have gone over EVERYTHING! If an item is in a different color, it is linked to a project on this blog. 


Most of our projects do not get on here, though.


Let's take a tour...

When you first walk in, the children's art smocks [children's size small/6-8 t-shirts] are hanging on an accordion cup rack. They know to grab one and find a seat, putting on their smocks first thing. Even the littlest ones grab one on their own.


Above that is our sign. The letters are easily removable if I ever decide to change them.


And above that is our dedication space. A lot of people have donated products, materials, and money that have gone into this space, and I wanted to acknowledge their contributions. These are printed out, laminated, and adhered to the wall with spray adhesive.


Our activity table is the top from a dining room set I purchased 20 years ago. It was scratched and well loved, so I sanded, primed and painted it. The chairs were donated by my friend Ledonna Woolsey who went to home care from running a center. 


The two barstools were donated by my clients Heather and Steven Hunt. If the activity is process oriented, then I simply sit back and let them at it. If it is really messy or very involved, then I have my son Jacob sit in with me to assist with keeping an eye on, and helping, the littler ones.


To the left side of the door, I have two of my craft carts that I got at Sam's Club for $30 each. It was a deal, as they usually go for twice that anywhere else.


I plan to get a cabinet or shelving to go above it. On top it holds a container that has tubes - toilet paper, paper towel, etc. and another with our Frisbees that we use as holders for craft items that may roll off the table and for salt writing.  Another gets everything thrown into it that I don't have time to put away properly when I get it. Parents drop off items and I put them in here until I can properly put them away.


  • Bling: glitter, jewels, sequins
  • Cotton Balls: large and small
  • Lids: moved to larger bin
  • Paper Die Cuts
  • Pipe Cleaners
  • Pom Poms
  • Silk Flowers & leaves
  • Stickers
  • Straws
  • Holiday Items [new]
  • Cards: fronts of holiday and occasion cards
  • Clothes Pins: various sizes & types
  • Corks: moved to larger bin
  • Doilies: various sizes of Valentine hearts and white ones
  • Packing Peanuts
  • Pinecones: big
  • Pinecones: small
  • Plastic: salvaged from misc. food and product packaging
  • Styrofoam: pieces and foam packaging
  • Styrofoam: chunk pieces
Next to these are a china hutch I received from my friend/quasi-SIL Tracy Simons. It holds:

My collection of foamies on the top left shelf:


Misc. Storage containers not in use at the moment on the second shelf, and the yarn bin, and some scrapbooking shape templates on the lower one.


Below those are my bin of tissue paper salvaged from every holiday and birthday party, especially by Miss A's grandma, Mrs. Truta, and a bin of scrapbooking paper, some of which has been donated by my cousin Julie Stokes.


The top middle has doors with handles that can hold a strap lock, so within here I store my adhesives, craft knives, spice/rice grinder, and concoction ingredients such as corn starch, Borax, flour, cream of tartar, food coloring, Koolaid packets, spices, salt, Epsom salt... and my own PERSONAL box of 64 crayons that I DO NOT SHARE.


Below is an open space where I have put up tension rods to hold up rolls of foil, wax paper, cling wrap, parchment paper and freezer paper. The last two I am currently out of. I have a metal strip from a foil container attached inside the doors above, so that I can pull the roll items up and cut them cleanly, without having to have anything sharp out around the children. I have my crepe paper just stacked in here, which needs a large bin. I also have CD cases and a couple of drawing instruction books.


In the doors below, I have my book binder and rice storage. I buy 50 pound bags of it at Sam's Club for crafts, bean bags [non choking hazard if they get ripped!] and heating pads.


The right side on the top shelf contains plastic cups of various sizes, foam bowls, large and small paper plates, paper condiment cups, white scratcher pads, envelopes, white and brown sandwich bags, cupcake liners and coffee liners.


Below that are some of my stamps and stamp pads. Some of those are still in the basement. The bottom shelf holds a materials tray, the book 1001 Paintings to See Before You Die, and a bin with a collection of previous craft activities that either need displayed or deconstructed and the items stored.


Next to this I have my bulletin board edges and some cardboard crowns stored on the wall by using binder clips and thumb tacks. On the floor in the corner are larger tubes from wrapping paper, etc. and rolls of wallpaper.


On the bottom is a bin of shredded filler of every color and type imaginable, various bubble wrap, and our cutting practice bin. Many of the fillers and yarns were bought at the Salvation Army and garage sales.


On top of this cabinet, I store pop bottles, bins of items such as corks, and our sensory bin fillers such as blue gravel, oats, hay, beans, birdseed, etc.


On the back wall,


I have two more craft carts and two paper sorters. I got the paper sorters a long time ago at Sam's Club for $20 each. On the top of the left craft cart is a bin of glue, glue sticks and Scotch tape and our bin of scissors, including teacher-assist, safety, and scrapbooking edgers.


The middle bins are FULL of crayons and markers. The paper sorters hold our construction and colored paper by color, along with tag board, corrugated cardboard, cardstock, specialty papers, and some specialty binding covers donated by my first client, Deidre Laughlin.


On top of the right side is a bin of ribbon reels and pieces and a bin of string & twine rolls, which are currently outside for projects there.


The two craft carts contain:

  • Beads
  • Beads [more]
  • Cording
  • Jewelry
  • Jingle Bells
  • Magnets
  • Puzzle Pieces
  • Shells
  • Tape: painters, masking, printed duct
  • Wooden Cut Outs
  • Buttons
  • Elastic
  • Fasteners
  • Lace
  • Patterns
  • Thread
  • Netting [new]: fabric and net grocery bags like from avacados
  • Trims
  • Trims
  • Velcro
I was lucky to happen upon a going-out-of-business sale for a pharmacy store, and bought these commercial shelving units for $30. The top holds miscellaneous small items such as containers of google eyes, brass brads, paint chips, colored pencils, dried lavender & chamomile, eye droppers, oil pastels, paint brushes and toothbrushes for crafts. The bottom holds our larger papers, poster boards, craft mats, and acts as a drying rack for our larger projects.


Above it, our art posters are out of their monthly and thematic file folders and out for daily viewing. These are up using sticky tack, so they are easily taken down for observation or instructional purposes. This isn't all of them, as we go through our 3-year rotating curriculum, I come across them and put them up. Not all artists are represented on the wall, as we have our art books to reference as well.


In the back corner is another china hutch that I painted white and covered the back in fabric with spray adhesive. This one was salvaged during our city's large item pick up.


The top shelf is crammed with paint of every kind.


The middle shelf holds:

  • Craft Sticks: small and large, colored and plain [donated by Nancy Ringle]
  • Colored rice
  • Colored tube pasta
  • Raffia
  • Modeling Clay
  • Beans
  • Sand and Gravel collection
  • Feathers
  • Cookie Cutters: misc. and alphabet
  • Foam Trays
  • Pie Tins
  • Plastic Trays
In the drawers and cabinets below are fabrics, including plastic, vinyl, fur, satins, velvet, etc., a drawer of felt,


and the sewing machine, iron and sewing box.


On the side I have hooks that hold our fly swatters and my cutting mats.

Above the side table are our art books, and below are 3 large bins that hold large foam sheets, plastic lids of all sizes [mostly donated by Jen Beutel and Tracy Simons], and fuse beads. At that same commercial sale, I got this small fridge for $25 to hold our homemade play dough. The bin on the left holds our painting tools and the one on the right holds some of our play dough tools/toys.


Our large roll of butcher paper sits atop the mini-fridge, comes over the back of the table, and under a straight edge used for cutting it to length. The table usually holds our sensory bin.

Next to these is a small, moveable sewing table with my Cricut on it. Which I have yet to use. 

Under the craft table in the middle of the room, are two paper sorters. One I salvaged, again, from large-item-pick-up and the other I got at a thrift store for $10.

The first one holds a collection of sandpapers, cardboard scraps, cork flooring, flooring samples we use as textures for rubbings along with a piece of plastic light diffuser, paper grocery bags, and craft paper pieces.


The other side holds a collection of professional paint chip samples donated by Deidre, thin craft paper, misc. notebooks and old letterhead made of great quality paper with high cotton content we cut up and use.


Next to the entry way, I have melamine tray that I got on clearance at Walmart last fall that I use as a dry erase board for our art curriculum. Under that is a chalkboard donated by the Hunts. If the children finish early, they have the option of free drawing or using the chalkboard until the others finish.


And that's it...oh, wait, I forgot the closet...nevermind! [baby food jars, canvases, frames, cork, tiles & grout, salad spinner, heat guns...]  

The absolute BEST thing about this room, though, is that we can CLOSE THE DOOR and just LEAVE projects at any time to come back to later or to finish drying in place. No more shuffling around on table tops and counters when we try to do other things, or HAVING to put supplies away to clear for a meal or other activity.


It's one of the best uses of space I have ever made.


Follow Connie -'s board Art Ideas on Pinterest.
Tags: art, craft, room, preschool, home child care, daycare, home, child care, pre-k, arts & crafts, toddler, children's, kid's, class, classroom
Little Stars Learning